The author gives a GREAT tutorial to construct these using a Cricut cutting machine, plus some other punches and cutting implements.
I've adapted her designs to the Silhouette. Not only does it convert a "cut, modify, and assemble" project into a "cut and assemble" one, it lends itself to mass production. In my case, I needed 6 of each for a total of 24. Plus, in the Silhouette you can make these any size you'd like. The original tutorial was for a 5" square invite. To fit into the 5x5 envelopes my sister-in-law purchased, I needed a slightly smaller 4.75"x4.75". If you need them bigger or smaller, it's super easy to customize and cut.
These are examples of my assembled invites. The camera had some exposure issues with poor Toad, but his blue dots were really close in color to the originals, and not as light as they appear.
Ok, so first things first... In all of my files, I'm using plain cardstock, the kind you buy in the office paper section of Walmart or an office supply store, NOT fancy textured craft paper from the scrapbooking aisle. If you're using something besides plain cardstock, be sure to check your paper type and corresponding blade settings.
(Download the Master File HERE)
I created a master file of all four characters. It contains all of the pieces to make one of each type at the original 5"x5" size. Each invite has all of the pieces grouped together, so you if you need to resize it, all of the pieces will remain proportional. Ungroup (probably a few times, I over-group things!) them when you are done to access the individual pieces.
If you are making more than one character, it makes sense to group all of the pieces together by color to use your paper efficiently. Below are the individual files that do this. IMPORTANT - If you want an invitation size other than 4.75"x4.75", you will need to resize the master file, then populate these individual files with your new piece sizes.
My original goal was to make 6 of each, so whenever possible, you'll see that many parts jammed onto a page. I also tried to describe how many and what color you'd need per invite. So for the example immediately below, the paper should be black, and Mario and Luigi get one mustache each. Toad needs two eyes. So if you're making 6 like me, you'll need 6 of each kind of mustache and 12 Toad eyes. (It gets more complicated later, so I'll explain then, too!)
HERE is the zip file for all of the cut files you see below!
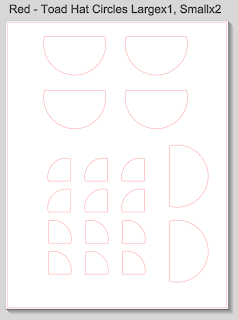
This last one is a bit tricky. Basically every character shares some of these shapes. I tried color coding them out to the left to make things clearer. You'll want to cut Mario's hat and shirt, plus Peach's lips out of red. Luigi just needs the hat and shirt in green, so you can move Peach's lips off the page before cutting those out. The very bottom of Peach's dress is the exact same as the hats, so ungroup as needed and move everything else off the page before cutting. Toad's hat is just Mario's shirt on the top and Mario's hat on the bottom, but in white. Nix the lips and cut those.
I hope this makes doing these invites easier! And thanks again to It's the Life for creating the invites and making such a great tutorial so everyone else can, too!


